
A good loading speed is very important for every business. It plays a major in high rankings on search engines like Google. Everyone wants to know about the secret behind fast loading sites. Apart from great web hosting and supporting plugins, you also need good caching plugins that can increase the loading speed of your website significantly. There are many Caching plugins to optimize your WordPress site. W3 Total Cache is one of the best caching plugins.
We will, therefore, discuss a step by step guide on how to install and set up W3 Total Cache for WordPress. We will show you the correct way of installing and setting up W3 Total Cache so that it can benefit your business making your website load faster.
What is W3 Total Cache?
W3 Total Cache is one of the fastest caching plugins. It is the most complete WordPress performance optimization plugin that can help you improve your website. It is being used and trusted by over a million users around the world.
W3 Total Cache improves server performance, reduces download time, and provides transparent content delivery network integration. It improves the overall user experience on your website.
How to install W3 Total Cache in WordPress?
Note: Before you install W3 Total Cache, you need to uninstall all other caching plugins you have on your site. If you do not do uninstall them, W3 Total Cache will have issues upon activation.
Install W3 Total Cache
Go to your WordPress admin panel. Click on Plugins -> Add New. Search for “W3 Total Cache” and you should see results like the image below:
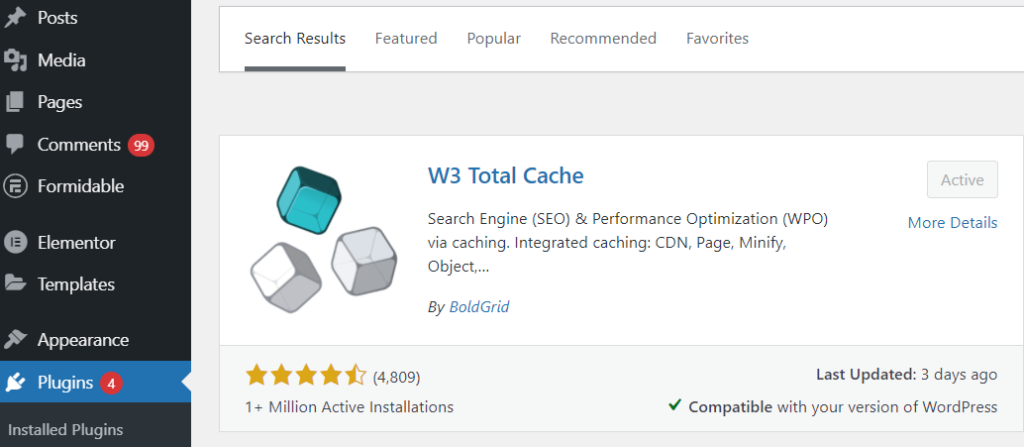
Click on the Install Now button. Click on activate.
Settings and Configuration of W3 Total Cache
1. General Settings:
Once you install and activate the plugin, you will start seeing the plugin on your left side of the admin panel.
Click Performance button to go to General Settings.
Performance -> General Settings
You will see all the options like ‘page cache’ on this page.
1.1) Page Cache
The first option that you see on this page is Page Cache. Page Cache is responsible for creating static cache pages for each page that is loaded on the website. It ensures that the page is not being dynamically loaded upon every page loads.
You should enable the page cache to significantly reduce the load time of your website. Refer to the image given below.

Check the Enable Page Cache box. Set the Page Cache Method to Disk: Enhanced.
Once done, click on Save all settings button.
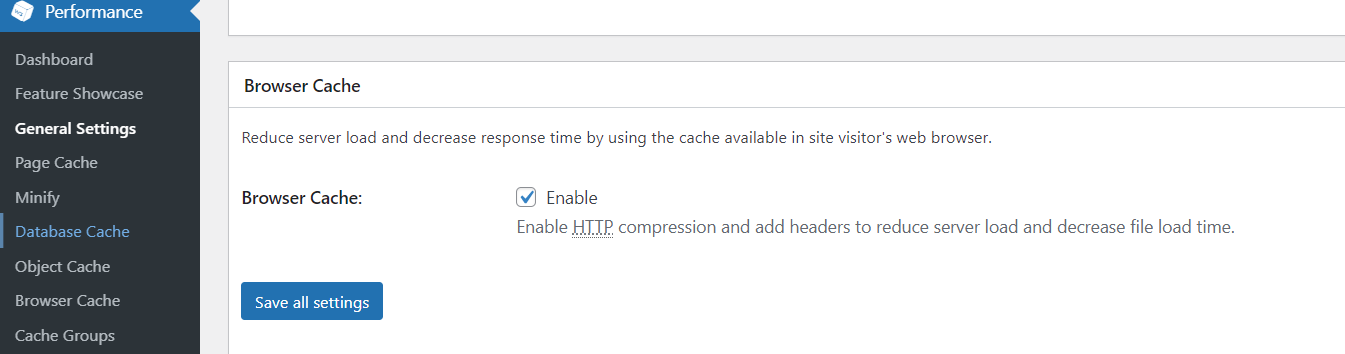
1.2) Browser Cache
Every time visitors visit a website, their web browser downloads all the images, JavaScripts, CSS files, and other static files. It downloads them in a temporary folder to provide the users with a good experience. It makes your website load much faster.
W3 Total Cache Browser Cache option allows you to set a time limit on the Browser Cache. It makes sense as you don’t change them every day.
Simply check the Enable under Browser Cache option and click the Save all settings button.
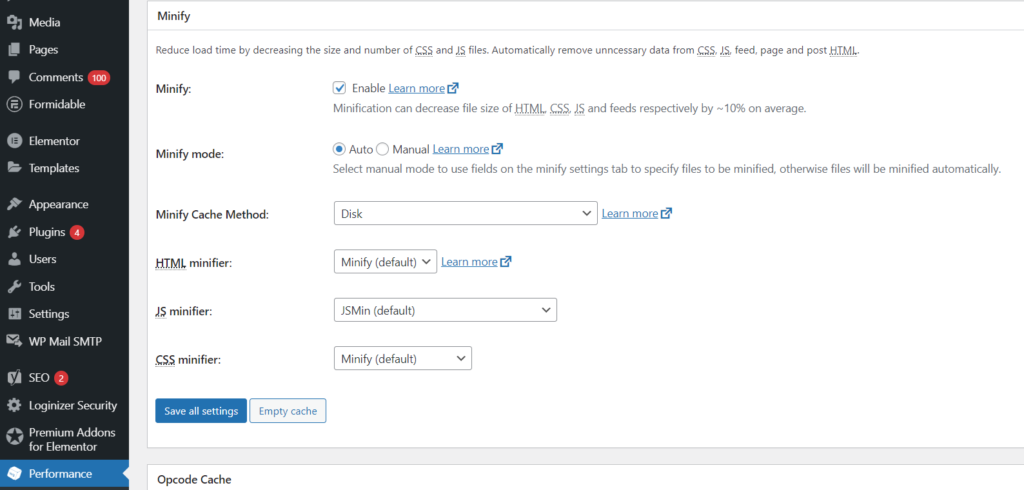
1.3) Minify
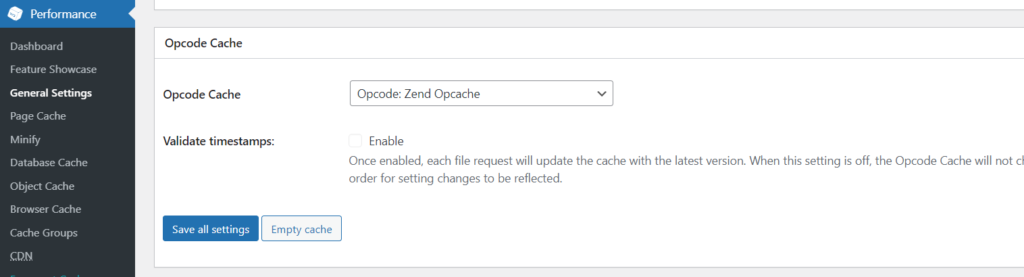
1.4) Opcode Cache
Choose Opcode:Zend Opcache for Opcode Cache and click on Save all settings.
1.5) Database Cache
Click enable for database cache. Choose ‘disk’ for cache method and then save all settings.

1.6) Object Cache
Click enable for database cache. Choose disk for cache method and then Save all settings.

1.7) User Experience
Use the image given below for all settings in user experience. Check all the fields and Save all settings.

2. Page Cache
Once you are done with General Settings, you need to do further settings like page cache. Check out the image given below and click Save all settings; once done.

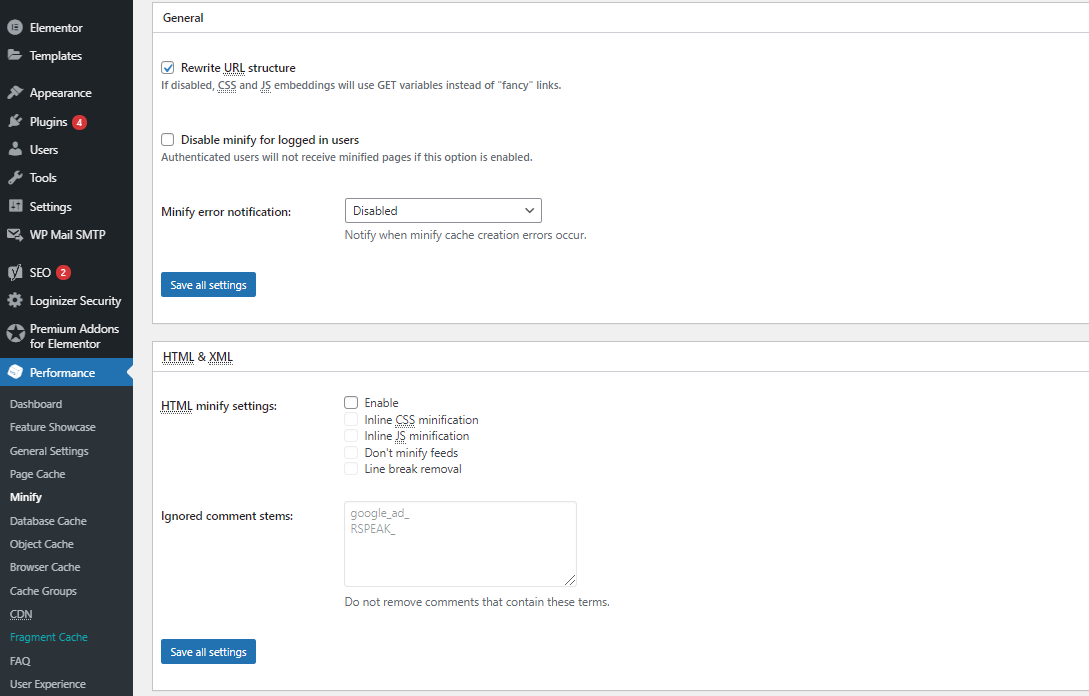
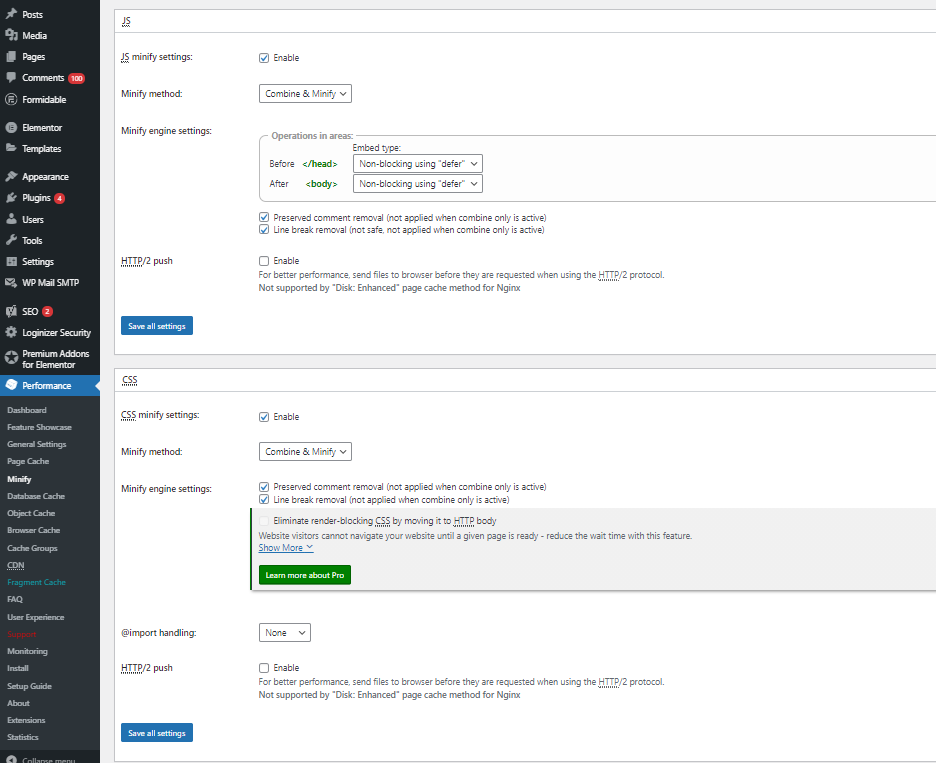
3. Minify
4. Object Cache

5. Database Caching
Summing Up!
A good caching plugin like W3 Total Cache is a must for any website. It can increases website loading speed dramatically and improve the website’s overall performance. An expert in website design and digital marketing can help you understand your website needs and setting up these caching plugins for your website’s overall growth.
If you have any questions, then please feel free to ask in the comments below. 😊


